Webhook Integrations with OpenClaw Agents: Complete Guide
Webhook Integrations with OpenClaw Agents: Complete Guide
Let's be honest: webhooks are one of those things that sound simple until you actually try to use them in production with AI agents. Then everything falls apart.
You set up a Stripe webhook to trigger your agent when a payment comes in. It works fine locally. You deploy it. And then you discover that your agent missed 30% of the events during a traffic spike, you have no idea which agent run consumed which event, and your carefully orchestrated multi-agent workflow has corrupted its own state because a retry came in at exactly the wrong moment.
I've been there. Most people building with AI agents have been there. The gap between "I got a webhook working in my tutorial" and "this thing runs reliably in production" is enormous. And it's exactly the gap that OpenClaw was built to close.
This is the complete guide to wiring up webhook integrations with OpenClaw agents — the stuff that actually matters when you're building real systems, not toy demos.
Why Webhooks With AI Agents Are Uniquely Painful
Before we get into solutions, let's be specific about the problems. Webhooks with traditional web apps are already annoying. Webhooks with AI agents are a different beast entirely because of three compounding factors:
Agent state is fragile. When a webhook retry hits a LangGraph agent mid-checkpoint, you can corrupt the entire thread. Traditional web apps are mostly stateless request handlers — they can absorb a duplicate event without much drama. An agent that's maintaining a conversation history, tool-call chain, and planning state? Not so much.
You need per-session callback URLs. If you're running 200 concurrent agent sessions (say, each handling a different customer's onboarding flow), each one needs its own webhook endpoint. Otherwise you're writing gnarly routing logic to figure out which event belongs to which agent thread.
Observability is nearly non-existent. With a normal web app, you can look at your server logs and piece together what happened. With agents, you need to trace from the incoming webhook → to the specific agent run → to the specific LLM calls that happened as a result. Nobody builds this from scratch without crying.
The typical indie hacker solution is a FastAPI endpoint with some manual retry logic, maybe a Redis queue, and a lot of prayer. It works until it doesn't. And when it doesn't, you have no way to figure out what went wrong.
Enter OpenClaw: The Webhook Layer Your Agents Actually Need
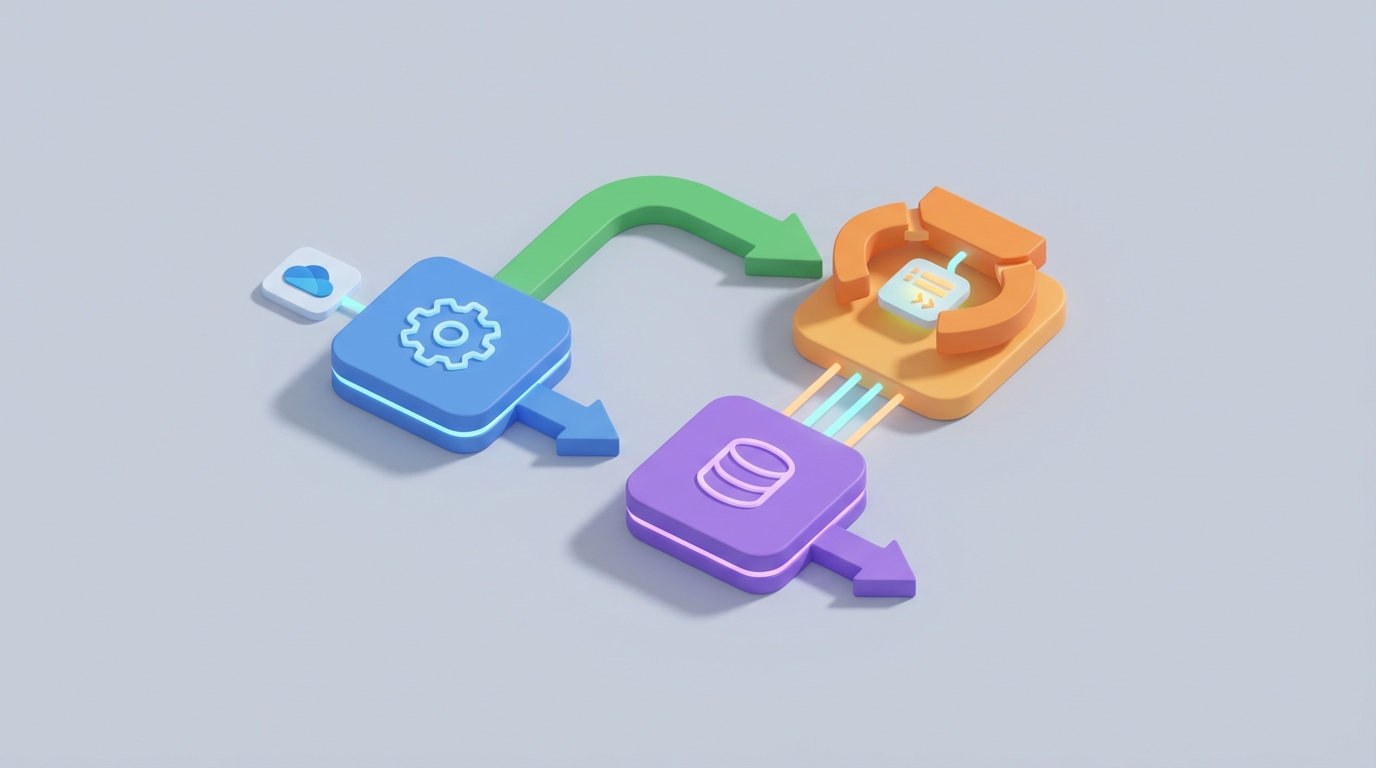
OpenClaw is an open-source webhook gateway and event bus built specifically for AI agent workflows. Think of it as the production-grade plumbing layer that sits between the outside world (Stripe, GitHub, Shopify, Resend, your own services) and your agent framework.
Here's what it gives you out of the box:
- Delivery guarantees with configurable retry policies, exponential backoff, and dead-letter queues
- Deduplication so duplicate webhooks don't spawn duplicate agent runs
- Per-thread callback URLs so each agent session gets its own stable endpoint
- Full event store with replay capability — you can re-deliver any historical webhook to any agent thread
- OpenTelemetry-native tracing that correlates webhook events to agent runs to LLM calls
- Centralized signature validation for dozens of webhook sources (Stripe, GitHub, Shopify, Clerk, etc.)
- Normalization that converts raw webhook payloads into clean, typed events your agents can actually work with
It's self-hostable (people run it on Fly.io, Railway, or bare metal) or available as a managed cloud service. No vendor lock-in, no proprietary nonsense.
Getting Started: Your First OpenClaw Webhook Integration
Let's build something real. We're going to set up an OpenClaw agent that listens for Stripe payment webhooks and kicks off an onboarding workflow for new customers.
Step 1: Install and Configure OpenClaw
# Install the OpenClaw CLI
pip install openclaw

# Initialize a new project
openclaw init my-onboarding-agent

# This creates:
# my-onboarding-agent/
# ├── openclaw.yaml        # Main config
# ├── agents/              # Agent definitions
# ├── sources/             # Webhook source configs
# └── events/              # Event type schemas
Your openclaw.yaml is where the magic starts:
# openclaw.yaml
project: my-onboarding-agent
version: "1.0"

sources:
  stripe:
    provider: stripe
    signing_secret: ${STRIPE_WEBHOOK_SECRET}
    events:
      - checkout.session.completed
      - customer.subscription.created

agents:
  onboarding:
    framework: langgraph  # also supports crewai, autogen, llamaindex
    entry: agents/onboarding.py
    thread_strategy: per_customer  # creates unique thread per customer ID

delivery:
  retry_policy:
    max_attempts: 5
    backoff: exponential
    initial_delay: 1s
    max_delay: 60s
  deduplication:
    enabled: true
    key: "$.id"  # Use Stripe's event ID for dedup
    window: 24h
  dead_letter:
    enabled: true
    notify: slack:#webhook-failures
A few things to notice here. The thread_strategy: per_customer setting means OpenClaw will automatically create and maintain a unique agent thread for each customer. No more routing logic on your side. The deduplication config uses the Stripe event ID, so even if Stripe retries the same event five times, your agent only processes it once. And the dead-letter queue sends failures to Slack so you actually know when something breaks.
Step 2: Define Your Event Schema
# events/stripe_events.py
from openclaw.events import EventSchema
from pydantic import BaseModel

class CheckoutCompleted(EventSchema):
    """Normalized event for Stripe checkout.session.completed"""
    source: str = "stripe"
    event_type: str = "checkout.session.completed"

    class Payload(BaseModel):
        customer_id: str
        customer_email: str
        amount_total: int
        currency: str
        subscription_id: str | None = None
        metadata: dict = {}

    # Map from raw Stripe webhook to our clean schema
    @classmethod
    def from_raw(cls, raw: dict) -> "CheckoutCompleted":
        obj = raw["data"]["object"]
        return cls(
            payload=cls.Payload(
                customer_id=obj["customer"],
                customer_email=obj["customer_details"]["email"],
                amount_total=obj["amount_total"],
                currency=obj["currency"],
                subscription_id=obj.get("subscription"),
                metadata=obj.get("metadata", {})
            )
        )
This is one of my favorite OpenClaw patterns. Instead of your agent parsing raw Stripe JSON (which is deeply nested and changes across API versions), you define a clean Pydantic model and a mapping function. Your agent only ever sees the normalized CheckoutCompleted event. This also means you can swap Stripe for LemonSqueezy later and only change the mapping — your agent code stays identical.
Step 3: Build the Agent
# agents/onboarding.py
from openclaw.agent import OpenClawAgent, on_event
from events.stripe_events import CheckoutCompleted

agent = OpenClawAgent(
    name="onboarding",
    description="Handles new customer onboarding after payment"
)

@agent.on_event(CheckoutCompleted)
async def handle_new_customer(event: CheckoutCompleted, context):
    """
    This function is called exactly once per unique checkout event,
    with full retry protection and state management handled by OpenClaw.
    """
    customer = event.payload

    # Access the agent's thread state (persisted automatically)
    state = context.state

    # Step 1: Send welcome email
    await context.tools.send_email(
        to=customer.customer_email,
        template="welcome",
        variables={
            "amount": f"${customer.amount_total / 100:.2f}",
            "currency": customer.currency.upper()
        }
    )
    state["welcome_email_sent"] = True

    # Step 2: Create account in your app
    account = await context.tools.create_account(
        email=customer.customer_email,
        stripe_customer_id=customer.customer_id,
        plan="pro" if customer.subscription_id else "one-time"
    )
    state["account_id"] = account.id

    # Step 3: Use OpenClaw's LLM integration to generate personalized onboarding
    onboarding_plan = await context.llm.complete(
        prompt=f"""Based on this customer's purchase, create a personalized
        3-step onboarding checklist:
        - Product: {customer.metadata.get('product_name', 'Unknown')}
        - Plan type: {'subscription' if customer.subscription_id else 'one-time'}
        - Amount: ${customer.amount_total / 100:.2f}

        Return as JSON array of objects with 'step', 'title', 'description' keys.""",
        response_format="json"
    )

    state["onboarding_plan"] = onboarding_plan

    # Step 4: Schedule follow-up webhook (OpenClaw can generate scheduled events)
    await context.schedule_event(
        event_type="onboarding.followup",
        delay="24h",
        payload={"account_id": account.id, "step": 1}
    )

    return {"status": "onboarding_started", "account_id": account.id}
The context object is where OpenClaw really shines. It manages your agent's state persistence, provides tool access, handles LLM calls, and even lets you schedule future events — all within a framework that guarantees your webhook was processed correctly.
Step 4: Deploy and Get Your Webhook URL
# Start locally for development
openclaw dev

# Output:
# ✓ OpenClaw dev server running
# ✓ Webhook URL: https://hooks.openclaw.dev/in/dev-abc123/stripe
# ✓ Agent "onboarding" registered
# ✓ Listening for: checkout.session.completed, customer.subscription.created
#
# Paste this URL into your Stripe webhook settings.
# All events are stored locally for replay.

# Deploy to production
openclaw deploy --platform fly
# or
openclaw deploy --platform railway
# or
openclaw deploy --self-hosted --config production.yaml
That webhook URL is stable. It doesn't change between deploys. And in production, each agent thread gets its own sub-URL automatically based on your thread strategy.
The Replay API: Your New Best Friend
This is the feature that converts people to OpenClaw overnight. During development, you'll inevitably need to test against real webhook payloads. Instead of triggering real Stripe events over and over (or mocking them poorly), you replay actual historical events:
# List recent events
openclaw events list --source stripe --last 24h

# Output:
# EVENT_ID                              TYPE                            TIME
# evt_1abc...                           checkout.session.completed      2026-01-15 14:32:01
# evt_2def...                           customer.subscription.created   2026-01-15 14:32:03

# Replay a specific event against your agent
openclaw replay evt_1abc --agent onboarding

# Replay against a specific thread (useful for debugging a particular user's issue)
openclaw replay evt_1abc --agent onboarding --thread cus_xyz789
You can also hit the replay API programmatically:
import httpx

response = httpx.post(
    "https://your-openclaw.dev/api/replay",
    json={
        "event_id": "evt_1abc",
        "target_agent": "onboarding",
        "target_thread": "cus_xyz789",  # optional
        "dry_run": True  # see what would happen without actually executing
    },
    headers={"Authorization": "Bearer your-api-key"}
)

print(response.json())
# {
#   "replay_id": "rpl_abc123",
#   "status": "completed",
#   "agent_output": {"status": "onboarding_started", "account_id": "acc_123"},
#   "trace_url": "https://your-openclaw.dev/traces/rpl_abc123"
# }
The dry_run option is incredible for debugging. It runs your agent against the event and shows you exactly what would happen, without actually sending emails or creating accounts.
Multi-Agent Fan-Out Patterns
Real-world systems don't have just one agent. You might have an onboarding agent, a billing agent, an analytics agent, and a notification agent — all needing to react to the same Stripe webhook. OpenClaw handles this with fan-out:
# openclaw.yaml
sources:
  stripe:
    provider: stripe
    signing_secret: ${STRIPE_WEBHOOK_SECRET}
    events:
      - checkout.session.completed

# Fan-out: one webhook triggers multiple agents
fan_out:
  checkout.session.completed:
    - agent: onboarding
      priority: high
    - agent: analytics
      priority: low
      async: true  # don't wait for completion
    - agent: billing
      priority: high
    - agent: notifications
      priority: medium
      delay: 5s  # slight delay to let other agents finish first
Each agent gets its own copy of the event, with independent retry policies and state. If the analytics agent fails, it doesn't affect onboarding. If you need to replay just the notification agent's processing, you can do that without re-triggering everything else.
Agent-to-Agent Communication
One of the most powerful (and underused) OpenClaw features is using it as an event bus between your own agents. Instead of agents calling each other directly (which creates tight coupling and debugging nightmares), they emit events that other agents can subscribe to:
# In your onboarding agent
@agent.on_event(CheckoutCompleted)
async def handle_new_customer(event: CheckoutCompleted, context):
    account = await context.tools.create_account(...)

    # Emit an internal event that other agents can pick up
    await context.emit_event(
        event_type="internal.account.created",
        payload={
            "account_id": account.id,
            "customer_email": event.payload.customer_email,
            "plan": "pro"
        }
    )
# Another agent subscribes to internal events
agents:
  crm_sync:
    framework: crewai
    entry: agents/crm_sync.py
    subscribe:
      - internal.account.created
      - internal.account.upgraded
This pattern gives you loose coupling, full observability (every inter-agent message is stored and replayable), and the ability to add new agents to existing workflows without modifying any existing code.
Security: Stop Writing Validation Boilerplate
If you've ever had to validate webhooks from multiple sources, you know the pain. Stripe uses HMAC-SHA256 with a timestamp. GitHub uses HMAC-SHA256 with a different header format. Shopify uses HMAC-SHA256 but with base64 encoding. Clerk does something else entirely. And if you get any of this wrong, you have a security hole.
OpenClaw centralizes all of this:
sources:
  stripe:
    provider: stripe
    signing_secret: ${STRIPE_WEBHOOK_SECRET}
    # Stripe signature validation happens automatically

  github:
    provider: github
    signing_secret: ${GITHUB_WEBHOOK_SECRET}
    ip_allowlist: true  # Only accept from GitHub's published IP ranges

  shopify:
    provider: shopify
    signing_secret: ${SHOPIFY_WEBHOOK_SECRET}

  custom:
    provider: generic
    validation:
      type: hmac-sha256
      header: X-Custom-Signature
      secret: ${CUSTOM_WEBHOOK_SECRET}
You configure it once, and OpenClaw rejects any webhook that fails validation before it ever touches your agent code. It also handles replay attack protection (checking that webhook timestamps aren't stale) and IP allowlisting for providers that publish their IP ranges.
Monitoring Production Webhooks
OpenClaw's built-in dashboard shows you exactly what's happening in real-time:
# Check the health of your webhook processing
openclaw status

# Output:
# SOURCE      EVENTS (24h)    SUCCESS    FAILED    AVG LATENCY
# stripe      1,247           1,241      6         142ms
# github      89              89         0         67ms
# internal    3,891           3,887      4         23ms
#
# AGENT       RUNS (24h)      SUCCESS    FAILED    AVG DURATION
# onboarding  1,241           1,235      6         2.3s
# analytics   1,247           1,247      0         890ms
# billing     1,241           1,241      0         1.1s
#
# DEAD LETTER: 6 events (oldest: 2h ago)
# Run 'openclaw dlq list' for details

# Inspect a specific failed event
openclaw dlq inspect evt_failed123

# Output shows the full event, all retry attempts, error messages,
# and the exact agent state at the time of each failure
For teams that use OpenTelemetry, every webhook event automatically gets a trace ID that propagates through your entire agent execution:
Webhook received (evt_abc) → Signature validated → Event normalized →
Agent "onboarding" started (run_xyz) → LLM call 1 (GPT-4) →
Tool call: send_email → Tool call: create_account →
LLM call 2 (GPT-4) → Event emitted: internal.account.created →
Agent completed (2.3s)
You can view these in Jaeger, Grafana Tempo, or any OpenTelemetry-compatible backend.
The Fast Track: Felix's OpenClaw Starter Pack
If you want to skip the boilerplate and get a production-ready setup running fast, I'd seriously recommend grabbing Felix's OpenClaw Starter Pack. It includes pre-built configurations for the most common webhook sources (Stripe, GitHub, Shopify), agent templates for popular frameworks (LangGraph, CrewAI), example event schemas, deployment configs for Fly.io and Railway, and a monitoring dashboard setup.
I've seen people go from zero to production-ready webhook integrations in an afternoon with this pack instead of the usual week of yak-shaving. It's particularly good if you're building a SaaS product where you need to react to payment events, user actions, and third-party service notifications — which, let's be real, is most of us.
Common Gotchas and How to Avoid Them
After talking to dozens of people building with OpenClaw, here are the mistakes I see most often:
Forgetting to set deduplication windows appropriately. The default 24-hour window works for most cases, but if you're processing high-volume events from sources that retry aggressively (looking at you, Shopify), you might need to extend it. Conversely, if you genuinely want to process the "same" event type multiple times (like repeated status updates), make sure your dedup key includes a field that changes between updates.
Not using dry-run replays during development. The number of people who test webhooks by... actually triggering real events in production... is terrifying. Use openclaw replay --dry-run liberally. Your future self will thank you.
Over-coupling agents through synchronous fan-out. If Agent B depends on Agent A's output, don't put them both in a synchronous fan-out. Instead, have Agent A emit an internal event that Agent B subscribes to. This way, Agent A's completion isn't blocked by Agent B's processing.
Ignoring the dead-letter queue. Set up notifications (Slack, email, PagerDuty) for DLQ events from day one. A failed webhook that sits in the DLQ for three days without anyone noticing is three days of a customer not getting onboarded.
What's Next
If you're building AI agents that need to interact with the real world — and if your agents are doing anything useful, they do — webhook integrations aren't optional. They're the nervous system of your entire operation.
Here's what I'd do right now:
- Install OpenClaw and run
openclaw initto scaffold a project - Grab Felix's OpenClaw Starter Pack if you want pre-built templates and configs to accelerate your setup
- Start with one webhook source (Stripe is the most common) and one agent
- Set up replay-based development from the start — capture real events and replay them during development
- Add monitoring and DLQ notifications before you go to production, not after your first outage
The gap between a demo and a production system is almost entirely about reliability, observability, and error handling. OpenClaw handles all three so you can focus on what your agents actually do instead of fighting with webhook plumbing.
Stop building webhook infrastructure from scratch. You have better things to spend your time on.