How to Use Canvas Mode in OpenClaw for Better Agent Planning
How to Use Canvas Mode in OpenClaw for Better Agent Planning
Let me be real with you: Canvas Mode in OpenClaw is probably the most underused feature on the entire platform, and it's the one that makes the biggest difference once you actually understand what it does.
I spent weeks building agents the "normal" way — chaining prompts, hoping the model would remember what it was supposed to be working on, watching it lose the plot halfway through a complex task. Then I switched to Canvas Mode and immediately wondered why I hadn't done it sooner. The difference isn't subtle. It's the difference between telling someone to build a house by shouting instructions from across the street versus handing them blueprints and letting them mark up the plans as they go.
If you've been struggling with agents that lose context, overwrite their own work, or just can't seem to handle multi-step planning without going off the rails, this post is for you. I'm going to walk you through exactly how Canvas Mode works, how to set it up, and how to structure your agents so they actually use it properly.
The Problem Canvas Mode Solves
Here's what happens without Canvas Mode, and I guarantee you've experienced this if you've built anything non-trivial in OpenClaw.
You set up an agent with a system prompt. You give it tools. You tell it to do something complex — say, research a topic, outline an article, write each section, then self-edit the whole thing. The agent starts strong. It does the research. It outlines. Then somewhere around section three, it starts contradicting section one. Or it rewrites the entire outline. Or it forgets the research entirely and starts hallucinating sources.
This isn't a model intelligence problem. It's a workspace problem. The agent has no persistent, structured place to put its in-progress work and refer back to it. Everything lives in the conversation history, which is linear, gets long, and eventually falls out of the effective context window.
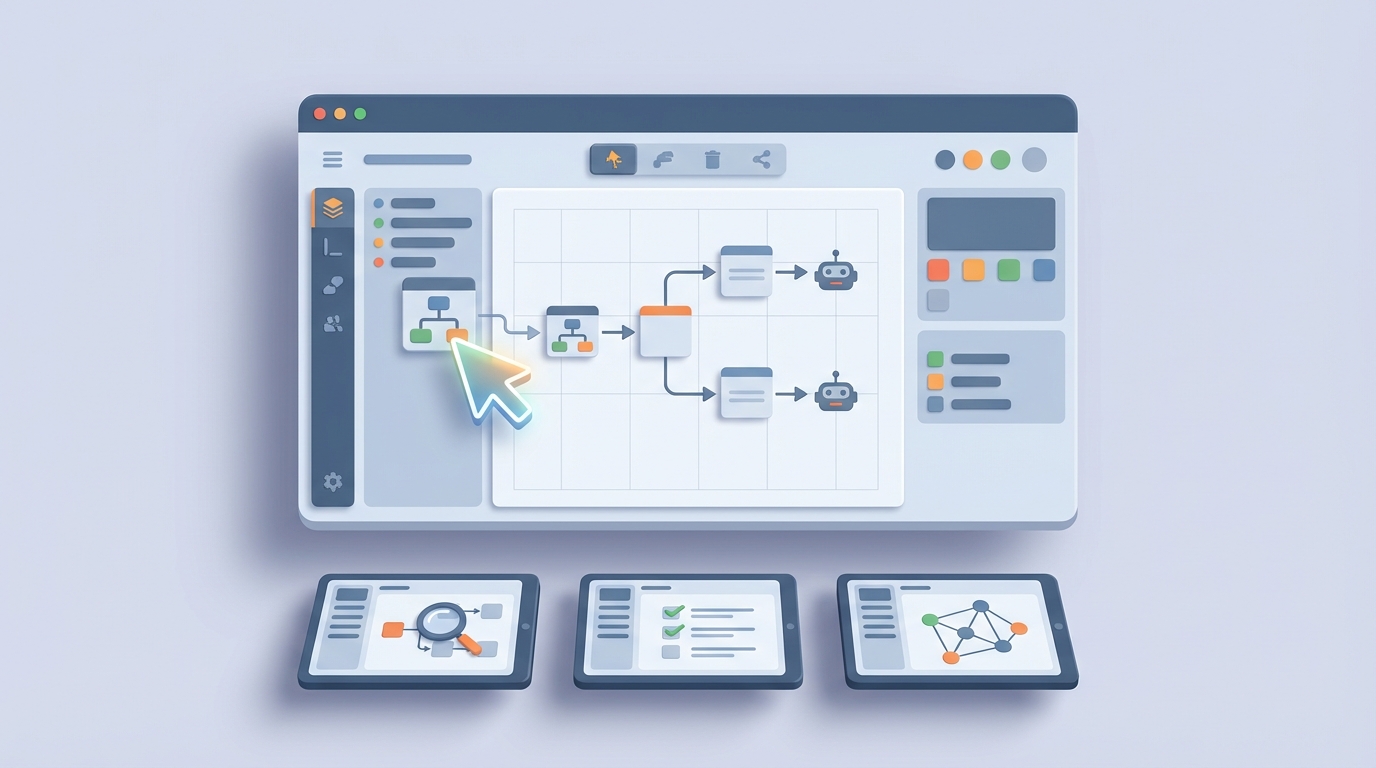
Canvas Mode gives your agent a dedicated workspace — a structured, persistent document that exists alongside the conversation but separate from it. Think of it as the agent's desk. The conversation is the agent talking through its thinking. The canvas is where the actual work product lives and evolves.
The agent can read from the canvas, write to specific sections, replace targeted blocks, and append new content — all without blowing away what's already there. This is fundamentally different from the typical "generate the whole thing again" approach that causes so many problems.
How Canvas Mode Actually Works in OpenClaw
Canvas Mode isn't a separate product or an add-on. It's a configuration layer you enable on any OpenClaw agent. When you activate it, the agent gets access to a set of canvas-specific operations that function like built-in tools.
Here's the basic setup in your agent config:
agent:
  name: "research-writer"
  model: "openclaw-default"
  canvas:
    enabled: true
    mode: "structured"
    sections:
      - id: "research_notes"
        label: "Research Notes"
        type: "append-only"
      - id: "outline"
        label: "Article Outline"
        type: "editable"
      - id: "draft"
        label: "Full Draft"
        type: "editable"
      - id: "changelog"
        label: "Edit Log"
        type: "append-only"
Let me break this down.
mode: "structured" means the canvas is divided into named sections. The alternative is "freeform", which gives the agent a single open document. Structured mode is almost always what you want because it prevents the agent from accidentally overwriting research notes when it's trying to edit the draft.
type: "append-only" means the agent can add to that section but can't modify or delete existing content. This is crucial for things like research notes and logs. You don't want the agent going back and "cleaning up" its research to match whatever conclusion it's currently leaning toward. That's how you get hallucination-by-revision.
type: "editable" means the agent can read, replace, insert, and delete content within that section. This is what you want for drafts and outlines that need iterative refinement.
Once canvas is enabled, your agent automatically gets access to these operations in its tool set:
canvas.read(section_id)           — Read the current content of a section
canvas.write(section_id, content) — Replace a section's content entirely
canvas.append(section_id, content) — Add content to the end of a section
canvas.insert(section_id, position, content) — Insert at a specific point
canvas.replace(section_id, target, replacement) — Find and replace within a section
canvas.get_structure()            — Return the current state of all sections
You don't have to define these tools manually. They're injected when canvas.enabled is set to true. The agent sees them like any other tool and can call them during its reasoning loop.
Setting Up Your First Canvas Agent
Let's walk through a concrete example. Say you want an agent that takes a topic, researches it using web search, writes a structured report, and then self-edits for quality.
Here's the full config:
agent:
  name: "report-builder"
  model: "openclaw-default"

  canvas:
    enabled: true
    mode: "structured"
    max_section_tokens: 4000
    sections:
      - id: "brief"
        label: "Assignment Brief"
        type: "read-only"
      - id: "sources"
        label: "Sources & Key Findings"
        type: "append-only"
      - id: "outline"
        label: "Report Outline"
        type: "editable"
      - id: "report"
        label: "Full Report"
        type: "editable"
      - id: "review_notes"
        label: "Self-Review Notes"
        type: "append-only"

  tools:
    - web_search
    - url_reader

  system_prompt: |
    You are a research report writer. You have a canvas workspace with
    dedicated sections for your work. Follow this process:

    1. Read the brief in canvas section "brief"
    2. Use web_search to find relevant sources. Log each source and its
       key findings to the "sources" section using canvas.append
    3. Once you have 5+ sources, create an outline in the "outline" section
    4. Write the full report in the "report" section, one section at a time
    5. Re-read your full report, then add self-review notes to "review_notes"
    6. Make targeted edits to the report based on your review

    IMPORTANT: Always use canvas operations to store your work. Do not
    try to keep the report in conversation memory. The canvas is your
    workspace — use it.
A few things to notice:
The "read-only" type on the brief section. You pre-populate this with the user's request before the agent starts. The agent can read it but can't modify it. This prevents a subtle but common failure mode where the agent "adjusts" the assignment to be easier as it goes.
max_section_tokens: 4000 keeps any single section from bloating beyond a reasonable size. If the agent tries to write a 10,000-token report into one section, it'll get an error and need to break things up. This is a guardrail, not a limitation.
The system prompt explicitly tells the agent to use the canvas. This matters more than you'd think. Even with canvas tools available, agents will sometimes try to just output the report in the conversation unless you clearly instruct them to use the workspace.
The Pattern That Makes Canvas Mode Click
Here's the workflow pattern I've found works best, and it's the one I use for basically every canvas-enabled agent now:
Phase 1: Gather → Append-Only Section The agent collects information and appends it to a log-style section. No editing, no summarizing, just raw material accumulation.
Phase 2: Plan → Editable Section The agent reads its gathered material and creates a structured plan (outline, checklist, architecture doc, whatever fits the task). This section is editable because plans need revision.
Phase 3: Execute → Editable Section
The agent works through the plan, building the actual deliverable in an editable section. It can use canvas.insert and canvas.replace for surgical edits rather than rewriting everything.
Phase 4: Review → Append-Only Section The agent reads its own output and logs review notes. Append-only again, so it can't cover its tracks.
Phase 5: Revise → Back to the Editable Sections Using its review notes as a guide, the agent makes targeted edits to the deliverable.
This gather-plan-execute-review-revise loop is what separates agents that produce mediocre first drafts from agents that produce genuinely polished output. And Canvas Mode is what makes it possible without the agent losing its mind halfway through.
Tips That Took Me Way Too Long to Figure Out
Use canvas.get_structure() at the start of multi-turn sessions. If your agent runs across multiple invocations or has a long execution time, start each turn by having it read the canvas structure. This re-grounds the agent in where things stand.
Don't make everything editable. The append-only constraint is your best friend. Every section that doesn't strictly need editing should be append-only. This single change eliminated about 70% of the "the agent revised away its own research" problems I was hitting.
Keep sections focused. One section per concern. Don't put research notes and the outline in the same section. The agent will start blending them. More sections with clear labels beats fewer sections with vague purposes.
Pre-populate the canvas when possible. If you have a template, an existing draft, or specific requirements, load them into the canvas before the agent starts. Starting with structure is always better than starting from blank.
# Example: Pre-populating canvas before agent execution
from openclaw import Agent, Canvas

canvas = Canvas(mode="structured")
canvas.add_section("brief", label="Assignment Brief", type="read-only")
canvas.set_content("brief", user_request)

canvas.add_section("template", label="Report Template", type="read-only")
canvas.set_content("template", """
## Executive Summary
[Agent fills this in]

## Key Findings
[Agent fills this in]

## Methodology
[Agent fills this in]

## Detailed Analysis
[Agent fills this in]

## Recommendations
[Agent fills this in]
""")

canvas.add_section("report", label="Final Report", type="editable")

agent = Agent(
    name="report-builder",
    canvas=canvas,
    tools=["web_search", "url_reader"]
)

result = agent.run()
final_report = canvas.get_content("report")
Use the changelog section for debugging. When something goes wrong (and it will), having an append-only log of what the agent was thinking during each edit is invaluable. Without it, you're trying to reconstruct intent from diffs.
Multi-Agent Canvas Workflows
This is where things get really interesting. Canvas Mode supports shared canvases across multiple agents. You set up one canvas and pass it to different agents with different permissions.
workflow:
  canvas:
    shared: true
    sections:
      - id: "requirements"
        label: "Requirements"
        type: "read-only"
      - id: "research"
        label: "Research"
        type: "append-only"
      - id: "draft"
        label: "Draft"
        type: "editable"
      - id: "feedback"
        label: "Editor Feedback"
        type: "append-only"

  agents:
    - name: "researcher"
      canvas_permissions:
        research: "append"
        requirements: "read"
      tools: ["web_search", "url_reader"]

    - name: "writer"
      canvas_permissions:
        research: "read"
        requirements: "read"
        draft: "write"
      tools: []

    - name: "editor"
      canvas_permissions:
        draft: "read"
        feedback: "append"
        requirements: "read"
      tools: []
The researcher can only append to research. The writer can only read research and write the draft. The editor can only read the draft and leave feedback. Nobody can touch the requirements.
This solves the race condition problem that plagues most multi-agent setups. Agents aren't fighting over the same document. They have clear lanes. The canvas acts as a shared workspace with access control built in.
When Not to Use Canvas Mode
Canvas Mode adds overhead. For simple, single-turn tasks — answer a question, classify some text, extract data from a document — you don't need it. The canvas shines on tasks that are:
- Multi-step with intermediate work products
- Long-running where context window pressure is a concern
- Collaborative across multiple agents
- Self-reviewing where the agent needs to critique and revise its own work
If your agent finishes its job in one tool call and a response, skip the canvas. Don't add complexity where it's not needed.
Getting Started Without the Headache
If you want to skip the trial-and-error phase of figuring out which section types to use, how to structure permissions for multi-agent flows, and what system prompt patterns actually get agents to use the canvas consistently — Felix's OpenClaw Starter Pack on Claw Mart is genuinely the fastest way to get up and running. It's $29 and includes pre-configured canvas skills for the most common agent patterns: research-to-report, multi-agent review workflows, iterative code generation, and a few others. The system prompts alone saved me hours of the kind of tedious prompt engineering where you're trying to get the agent to stop ignoring its own canvas. If you don't want to set all this up manually, that pack includes pre-built versions of everything I've described here, already tested and working.
What to Do Next
Start with one agent and one simple canvas. The report-builder example above is a great first project. Get comfortable with the section types and operations. Then try adding a second agent with a shared canvas. Once that clicks, you'll start seeing canvas-shaped solutions everywhere.
The biggest mindset shift is this: stop thinking of agents as conversation participants and start thinking of them as workers with a desk. The conversation is how they communicate with you. The canvas is where they do the work. Keep those separate, and everything gets easier.